| Search results - "buttons" |

Tagliare per eliminare parte del coperchio - Cut to remove part of the cover14 viewsE' meglio prima levare il circuito stampato e poi la lama della chiave, per evitare di danneggiarlo. Tagliare sopra il tasto superiore per rimuovere solo la parte con i tasti.
Is better to remove the printed board first then the key, to prevent damage. Cut over the top button to remove only the part with the buttons.
|
|
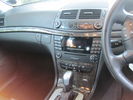
Mercedes E320 The Buttons!29 views
|
|

MY2010 Key Buttons27 views
|
|
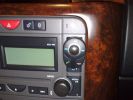
position of buttons for Parrot phone102 viewsthis can be put basically anywhere as it connect via bluetooth to the rest of the system. It is self powered (lithiam battery in it) so just stick it anywhere with no requirements for finding a live wire etc
|
|

Start buttons2 views
|
|
The cam with microphone/control buttons178 views
|
|

Thread upload13 viewsImage uploaded in new thread
|
|

174 views
|
|
47 views
|
|

Thread upload2 viewsImage uploaded in thread 149311
|
|

Thread upload2 viewsImage uploaded in thread 183929
|
|

Thread upload10 viewsImage uploaded in thread 121445
|
|

Older Cell Phone handset holder operation and components841 viewsThis 8 page pdf explains the operation of the older Cell phone handset holder and shows the various components as related to the radio and phone buttons etc.
|
|
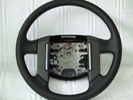
steering wheel c/w horn buttons. No airbag or cruise/audio controls19 views
|
|
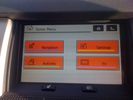
220 views
|
|

Alternate Buttons D4 Radio18 views
|
|
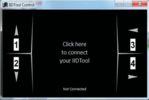
Alternate Buttons Program13 views
|
|

New switch18 viewsNearly 5 years ago, I fiddled with some push-buttons, until one day I came across those marine Contura rocker switches :)
The remote control is the switch just behind the EPB.
|
|

buttons for operating gvif169 views
|
|

Steering Buttons61 views
|
|

471 views@ home, we have 2 remote controlled garage doors. So I installed the remote controller in the car, added 2 buttons and off we go. Lucky me the controller worked at 12V anyway :D
I'll add a LED onto that one, so I'm sure it works when I press :)
|
|
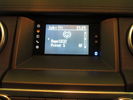
D4 Lowest Grade Radio - Screen Closeup70 viewsThe monochrome screen with colour-lit icons on the left to indicate source, and bluetooth icon on the right to indicate connectivity. There are also two hardware buttons for hour/minute clock setting.
|
|
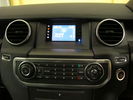
D4 Lowest Grade Radio - Wide Angle75 viewsThe CD player is at the bottom of the picture, the control buttons in the middle, and at the top is the screen with colour-lit icons on the left to indicate source, and bluetooth icon on the right to indicate connectivity. There are also two hardware buttons for hour/minute clock setting.
|
|
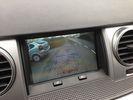
6 viewsNo buttons to press, simply stick it in reverse! This camera is also great @ night. More pictures to follow later this evening, so happy when I was done I just wanted to reverse in & out of car parks lol
|
|
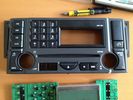
Hk Logic 7 Head Unit Facia replacement9 viewsReplaced facia due to broken buttons
|
|

Steering Wheel Stereo Buttons18 views
|
|

Door Lock Wiring Diagrams1717 viewsNear the bottom of this 5 page pdf on page 224 are shown the pushbuttons and locking mechanisms for the rear hatch and tail gate.
The pdf will open vertically but you can download and print it out or just rotate the image clockwise by right clicking on your screen and selecting the "Rotate Clockwise" button.
|
|
![Filename=LR3_Radio_Removal[1].pdf
Filesize=190KB
Dimensions=320x240
Date added=04.Feb 2014 LR3_Radio_Removal[1].pdf](images/thumb_pdf.jpg)
Radio Removal from Radio Stack567 viewsThis shows how to remove the radio from the stack. Basically you remove the H surround first and then at least loosen all the Torx 20 screws left and right sides from the top down starting at the narrow unit that the four way flasher/locking buttons are mounted on.
The units kind of interlock, hence some movement of each is required to remove the radio by itself. I find it best to take out the four way flasher/locking buttons assembly first as that allows access to the fibre optic cable connector into the back of the radio head without too much tugging.
|
|
Thread upload1 viewsImage uploaded in thread 177333
|
|

Thread upload7 viewsImage uploaded in new thread
|
|
|
|
|
|