| Search results - "carpet" |
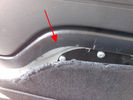
Rimozione pannello dalla sponda - Tailgate panel removing43 viewsPer togliere il pannello moquettato dalla sponda ho fatto leva con un cacciavite abbastanza grosso nel punto indicato, è stato veloce e non ho rovinato niente.
To remove the carpeted panel away from the tailgate I used a big enought screwdriver at the point indicated, it was fast and I have not ruined anything.
|
|
Casters just touch the carpet23 views40%
|
|

sticking carpet128 views
|
|
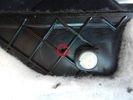
Foro pannello - Panel hole40 viewsHo forato il pannello moquettato per far passare il cavo di emergenza.
I drilled the carpeted panel to drive the emergency cable.
|
|
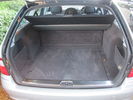
Mercedes E320 Boot18 viewsPlease note, any marks are just the pile of the carpet.
|
|
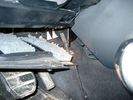
Air Conditioner Drain Hose on Drivers Side (LHD)2256 viewsThe corrugated rubber bit above and to the right of the gas pedal is the drain hose that goes down thru the carpet and floor sheet metal.
While it is bit hard to figure out from the jpg above, there is a rubber "strap" attached to the top of the corrugated hose that one uses to pull on to drag the hose up back around the black plastic heater "pan" drain. The same drain hose arrangement is on the other side as well.
One could I suppose run a plastic snap tie around the vertical pull strap if one was concerned about the hose slipping off again. See also the other jpg sketch which is from the Land Rover manual.
|
|

Thread upload28 viewsImage uploaded in thread 92518
|
|

Thread upload22 viewsImage uploaded in thread 92518
|
|

Thread upload26 viewsImage uploaded in thread 92518
|
|
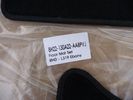
Mat Set Label50 views
|
|
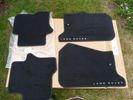
Mat Set55 views
|
|
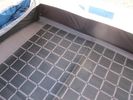
25 views
|
|
Thread upload13 viewsImage uploaded in thread 157725
|
|
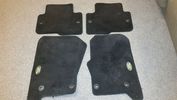
carpets1 views
|
|

Badge1 views
|
|
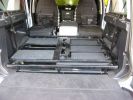
water tank353 viewsFlip up doors for extra storage under sub frame.
L.H.S covered with carpeting.
|
|
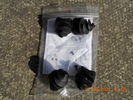
Carpet/mat screw fittings ( enough for two carpets/mats 038 views
|
|

Thread upload3 viewsImage uploaded in new thread
|
|
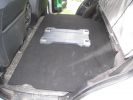
Floor Finished with Carpet and Engel Floor Plate170 views
|
|

Right side of carpeted trim piece34 views
|
|

Left side of tailgate carpeted trim piece39 views
|
|

961 viewsRipping off the cheap carpet reveales the galvanised steel box with sharp edges that has been fixed in with 4 ton of silicon.
|
|

775 viewsShows the newly aquired space with the lid down, this will be covered with the right carpet as soon as i get my hands on some
|
|

Finally, finished with carpet.710 views
|
|
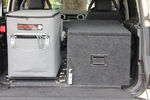
54 viewsengel fridge and cargo drawer rear of the D3.
Base board is MDF, think this may be called ply elsewhere covered with marin carpet on both sides and screwed through the 4x tie down holes with M10 bolts
|
|
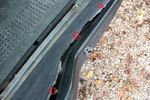
The arrows are where I prized carpet up94 views
|
|
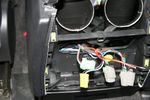
Power supply coming out from center consul, going down carpet split.62 views
|
|
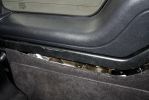
105 viewsCarpet panel pried away from tailgate trim
|
|

LR3 Air Conditioner Drain Tubes behind centre console2091 viewsThis shows the two air conditioner drain tubes located left and right under the radio stack.
The tube on the left side, (steering wheel side, LHD), disattached itself and the carpet on the floor under the gas pedal etc became soaked. I think rain water from outside that comes in the outside cowl vents also exits via the tubes as I first noticed the carpet was wet after parking outside during a big rain storm.
It was relatively easy to slide up and reattach the rubber hose that runs from the rectangular shaped plastic discharge hole(s) of the heater "pan" down along the transmission hump area and thru the floor pan. There is a hose on each side of the transmission hump, but only one hose had let go on my 3. The rubber hoses just slide over the rectangular plastic openings of the two heater housing drain outlets.
To get at each drain hose, remove the vertical sort of triangle carpeted piece below each side of the radio stack. The triangles of carpet will just pull away as each is held on with those metal U clips Land Rover so likes. Dislodge each triangle at least sufficiently to get ones hand in to slide the rubber hose back on.
You will rarely see AC water on the ground as the front drains pour onto a metal underside protection skid plate and the rear drain onto the top of the left rear muffler.
|
|
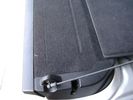
Flexible wire rope fishing leader 0.032" diameter exiting carpet 1930 viewsThis is all you see of the completed mod.
The short little angled "line" about an inch long that looks like a piece of debris and is located a few inches "above" the support cable is actually the wire rope release cable exiting from under the carpeted lift gate cover.
I drilled a very small hole in the carpet and pushed the 0.032" diameter release wire thru and then slipped the loose end under the black plastic.
To release with the lift gate etc closed, from the inside, just pull the loose end free from under the black plastic and gently pull wire about 5mm, (1/4"), and the upper door catch should release. You will have to manually push the upper door out wards to actually effect opening, but you will already be inside the rear cargo area so that part is easy to do.
The assumption is that the lower door latch still works electrically and hence, the lower lift gate half will open as normal by pressing the usual button on the top left of the lower door half.
|
|

Carpet Panel Removed showing Bass Speaker and Dust Shield 1721 viewsSomething is wrong with the orientation, however this shows what you see when the carpet is removed.
The dust shield, (under which the actuator is located), in the picture is as yet uncut. The white bit is the underside of the plastic lower lift gate carpeted cover panel.
The round thing is the woofer speaker for the Harmon Kardon radio. When the radio is working, one can see the speaker moving, but not much bass sound actually seems to emanate from the speaker.
|
|
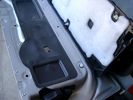
Carpeted cover removed showing uncut dust seal and underside of carpeted cover. 1616 viewsNote that there are all sorts of electrical wires sticking to the underside of the dust shield - so be very careful when you cut thru the shield.
I used a box knife very slowly and was surprised at how many conductors there were running just under the shield membrane.
|
|
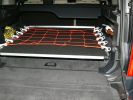
Sliding floor - closed position514 viewsMaterials: 17mm formply, ex 1000mm piano hinge, 2x Haefele 160 kg sliders, timber brackets for the floor to connect the sliders, aluminium angle for leading edge, 50x3mm aluminium flat drilled for the tie-down net connectors, 2x galv iron flat folded to form angle brackets (to secure sliding loadspace to floor), 1 square metre of black carpet to match the back of the seats.
|
|
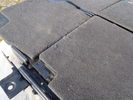
For sale - third row seats15 viewsThis picture shows the scuffing to the carpet on the back of the seat. Easy to tidy up with a bit of glue if required.
|
|
23 views
|
|
|
|
|