| Search results - "clip" |
Whats the clip for?176 views
|
|
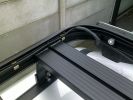
Cabling Front Runner Spots228 viewsThanks to Ifor Williams clips ;)
|
|
clips undo132 views
|
|
grille clips 1 X 4146 views
|
|
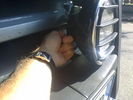
grille clips 2 position146 views
|
|
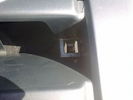
glille clips 2 X 2138 views
|
|
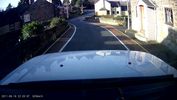
BlackVue DR40030 viewsA still from the first clip (before the date was set), good picture quality.
|
|

3D Printed Samsung Galaxy S5 Phone Mount17 viewsDesigned to fit a Brodit Clip Mount (in this case one for an Isuzu DMAX)
|
|
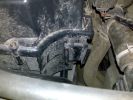
Unused clip slot to the front of the airfiler housing96 views
|
|
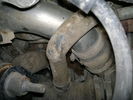
Charge Air Pipe - turbo end.101 viewsThe maint manual identifies releasing the pipe hose clip in the center of the photo. Pity who ever built this engine Put the hose in such a position that access to it was near impossible. I released the other clip at the turbo end of the flexi hose. Easy to get to but a right git to release the hose of the turbo.
|
|
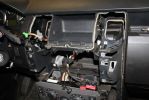
02278 viewsDash center console off and factory head unit out. LR clips suck.
|
|
Thread upload22 viewsImage uploaded in thread 115058
|
|
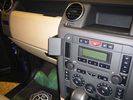
D3 Brodit clip15 views
|
|
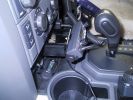
UHF CB438 viewsThe remote head of the GME TX3400 was mounted on the front of the ashtray after unclipping the ashtray facia. The head is very light, double sided tape was used plus 1 screw to hold it.
|
|
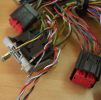
AirBag Pins78 viewsNew Wiring at AirBag ECU just need to back out the pins of the old and clip in the new.
|
|
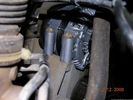
58 viewsOne bolt is visible at the front, but the other two are down the left hand side and best accessed by removing the small plastic guard behind the bumper. I also removed the small metal radiator guard between the bumper and the main sump guard (but that was mostly to retrieve the spanner I dropped!). The only issue with removing the plastic guard is the stupid plastic clips that hold it on may need to be replaced.
|
|
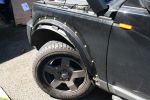
Wheel Arch Trim Removed148 viewsLuckily I didn\'t break any clips
|
|

Clips10 views
|
|

Clip positions on mirror base shelf57 views
|
|
LEAK OFF PIPE7 views
|
|
Thread upload6 viewsImage uploaded in thread 190962
|
|
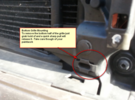
Thread upload36 viewsImage uploaded in thread 115118
|
|

Thread upload8 viewsImage uploaded in thread 121641
|
|
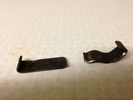
Thread upload9 viewsImage uploaded in new thread
|
|
Thread upload12 viewsImage uploaded in thread 124861
|
|

12 views
|
|

Clips12 views
|
|
64 views
|
|

Thread upload3 viewsImage uploaded in thread 149931
|
|
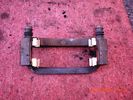
Caliper carrier with new anti rattle clips101 views
|
|
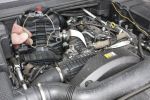
Remove Clip944 viewsRemoving the air box/EGR butterfly housing securing clip
|
|

44 views
|
|

Thread upload45 viewsImage uploaded in thread 123552
|
|
Thread upload10 viewsImage uploaded in thread 142089
|
|

Thread upload4 viewsImage uploaded in new thread
|
|

Thread upload0 viewsImage uploaded in new thread
|
|
Thread upload9 viewsImage uploaded in new thread
|
|

Thread upload9 viewsImage uploaded in thread 155880
|
|

Thread upload1 viewsImage uploaded in thread 150318
|
|

Thread upload0 viewsImage uploaded in thread 181600
|
|
97 views
|
|

Front brake clips23 views
|
|
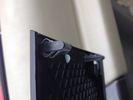
Speaker grill clip3 views
|
|

Thread upload2 viewsImage uploaded in thread 176763
|
|

Thread upload1 viewsImage uploaded in thread 199620
|
|
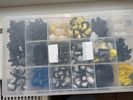
Thread upload2 viewsImage uploaded in new thread
|
|

Various Clips285 viewsBits and Bobs stitched together
|
|
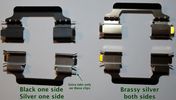
Front brake clips21 views
|
|

Thread upload1 viewsImage uploaded in thread 199620
|
|
Thread upload1 viewsImage uploaded in new thread
|
|
Thread upload0 viewsImage uploaded in thread 184642
|
|
Thread upload0 viewsImage uploaded in thread 184642
|
|
Thread upload0 viewsImage uploaded in new thread
|
|
Thread upload0 viewsImage uploaded in thread 184642
|
|
Thread upload0 viewsImage uploaded in thread 184642
|
|
Thread upload0 viewsImage uploaded in thread 184642
|
|
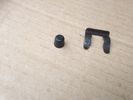
dust cover and clip23 views
|
|

169 views
|
|
176 views
|
|
Future D3 owner208 views
|
|
147 views
|
|
172 views
|
|

Thread upload25 viewsImage uploaded in new thread
|
|

Thread upload29 viewsImage uploaded in thread 190184
|
|
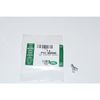
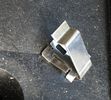
Clip Spring Metal FYC 500040 that holds LR together1744 viewsThe jpg is of the spring metal clip, Land Rover part number FYC 500040 that holds most of our 3 together - well at least most the interior trim parts.
If you are going to remove interior panels, you may as well stock up on a few for replacement as upon panel removal, the clips tend to spring away into deep never to be found voids within your 3.
|
|

heated seats57 views
|
|

power to mats112 views
|
|

Broken clip ?32 views
|
|

Front and Side Clips - Seat Base38 views
|
|

Rear side clip removal - seat base44 views
|
|

Seat Base cover front and side clips released43 views
|
|

27 viewsShort clip of turbo actuator rod moving after key turned to position2/3
|
|
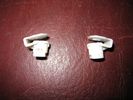
Clips to be removed when fitting a Mantec Plate139 views
|
|

Thread upload18 viewsImage uploaded in thread 170233
|
|
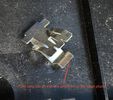
Thread upload18 viewsImage uploaded in thread 170233
|
|

17 views
|
|

Detent_Circlip_How_to220 views
|
|
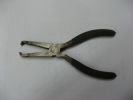
Clip puller129 views
|
|
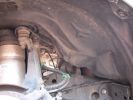
pull out the 3 clips circled in red294 views
|
|
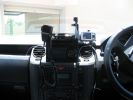
363 viewsHome made console, GPS in clip off mount, 29Mg radio,dual battery moniter,long rang tank gauge & elecric switches.A clip out removable console with no screws.PS also a camera mount.
|
|
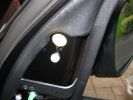
clip on tweeter housing499 views
|
|
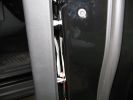
clips on door panel474 views
|
|
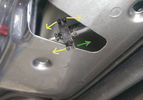
Thread upload11 viewsImage uploaded in thread 33743
|
|
Thread upload0 viewsImage uploaded in new thread
|
|

Thread upload0 viewsImage uploaded in new thread
|
|
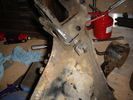
Don't forget the plastic clip63 viewshttp://www.disco3.co.uk/gallery/albums/edit/preview_8ffce58e.JPG
|
|
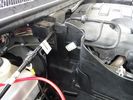
62 viewsThe spot where the isolator box goes had this small white clip. It looked like it was meant to hold something....so I removed it.
|
|
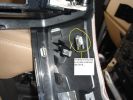
Trim clip 197 viewsthe reason for cout out on dash.
|
|
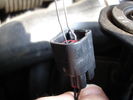
Bonnet Sensor Paperclip26 views
|
|
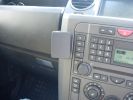
Brodit dash mount368 viewsBrodit ProClip 653573
|
|
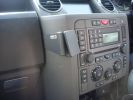
Brodit dash mount429 viewsBrodit ProClip 653573
|
|
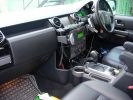
Piano black dash kit and Brodit proclip mounts681 views
|
|
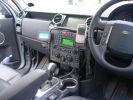
Piano black dash kit and Brodit proclip mounts585 views
|
|
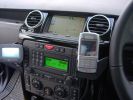
Piano black dash kit and Brodit proclip mounts611 views
|
|
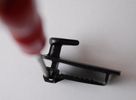
Mat Clips Discovery 4 201318 views
|
|
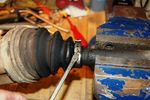
Undo Boot Clip88 views
|
|
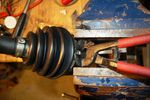
Clip crompression !!93 views
|
|
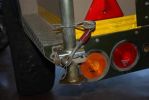
fitted stronger rear strut holders. not a great mod. the holes i drillled for the "R" clips are the best mod, as they stop the legs from sliding up under pressure. requires bracing inside to stop chassis bending100 views
|
|

Thread upload9 viewsImage uploaded in thread 126603
|
|
Thread upload1 viewsImage uploaded in thread 195635
|
|

Thread upload3 viewsImage uploaded in thread 195635
|
|
Thread upload1 viewsImage uploaded in thread 195635
|
|

Thread upload1 viewsImage uploaded in thread 195635
|
|
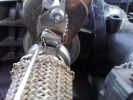
How to re-close the EGR clip with common tools157 views
|
|

Thread upload17 viewsImage uploaded in thread 170233
|
|
Thread upload17 viewsImage uploaded in thread 170233
|
|
Thread upload6 viewsImage uploaded in thread 136766
|
|
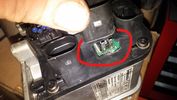
Thread upload7 viewsImage uploaded in thread 136766
|
|
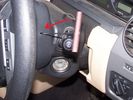
18 viewsFeel for the clip with the hook.
|
|
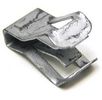
FYC50004082 viewsLower dash retaining clip
|
|
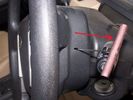
18 viewsPull the tool outward to release the clip.
|
|

Thread upload26 viewsImage uploaded in thread 110687
|
|
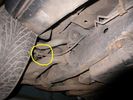
Thread upload24 viewsImage uploaded in thread 109204
|
|

Thread upload21 viewsImage uploaded in thread 109204
|
|
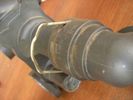
Thread upload8 viewsImage uploaded in thread 183363
|
|
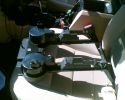
639 viewsCup holder panel showing the 8 locating lugs and clips
|
|
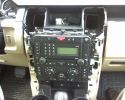
After removal of H-panel95 viewsCrikey, you have to pull HARD to remove this trim!!! Broke one clip and only lost half of it. Fit back with 3 clips ok. Yet to drive it to see if it rattles.
|
|
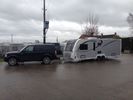
Buccaneer Clipper6 views
|
|
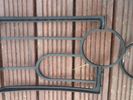
Light guards broken clip15 views
|
|
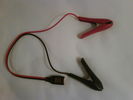
Croc clips52 viewsCrocodile clips with connector without dust/moisture cap.
|
|
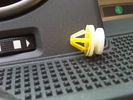
Trim Clip93 views
|
|
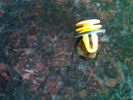
Trim Clip87 views
|
|
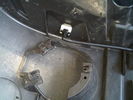
Underside View of Jet/Retainer Clip121 views
|
|
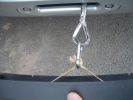
1735 viewsIndustrial elastic a stanless clip and a winch mount the number plate back in place
|
|

Switch is blue colour thing thru the rectangular opening.3149 viewsThe blue coloured plastic bit thru the rectangular opening is the brake light switch. The fist time, I found it easier remove the switch by dropping the horizontal plastic panel, (two screws), and then slipping my hand in and rotating the switch clockwise 1/4 turn. The second time, I was able to remove the switch thru the rectangular opening and did not need to remove the horizontal lower panel. Obviously, I had to remove the sloping knee pad panel, (note sort of hinged at the bottom so pull back from the top.)
Regardless, do not touch the brake pedal - just let it sit where it wants to. One has to first remove the angled knee pad panel that sits under the steering wheel. It can be pulled from the top corner at the door side. Pulling releases a pair of those U shaped metal clips that LR loves so dearly. You have to pull quite hard. The bottom is held by a couple of plastic fingers in a couple of slots so you pull at the top till the two clips release and then rotate the panel and pull upwards a bit.
To remove the switch, you rotate it clockwise and pull outwards. Rotating the switch clockwise automatically retracts the plunger back into the switch body away from the brake pedal arm.
Similarly when you install the new switch, the required 1/4 turn anti clockwise rotation action releases the plunger so it lays up against the brake pedal arm and at the same time, secures the switch in place.
To remove the electrical wires, the switch will drop below the horizontal pad and hang from the wires so unclipping the electrical connector plug is fairly easy to do.
|
|

The clips (one completely broken, one partially, and one ok) that hold the plastic locking mechanism to the camera.31 views
|
|
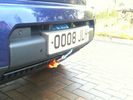
Redg plate mounting126 viewsThe original redg plate mounting was modified. An L-shaped piece of plastic now sticks out rearward from the top of the mounting and this hooks over the back of the top edge of the bumper cover. Then 2 spring clips hold the bottom edge of the mounting in place. Proximity sensor and surround camera seen unaffected.
|
|
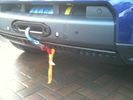
Recessed Hawse 143 viewsI had the hawse powder coated black which was not necessary in the end as it is normally hidden behind the number plate. The cutout of the hole in the bumper cover could have been a bit tidier, but again, it is usually hidden when winch not in use. Note the two clip receivers which hold redg plate mounting in situe.
|
|

IC hose lower clip46 views
|
|
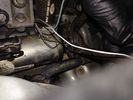
EGR replacement14 viewsBack of left EGR cooler was a swine to replace the clip. Bound it with wire before using pincers to clip together.
|
|
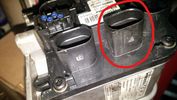
Thread upload7 viewsImage uploaded in thread 136766
|
|
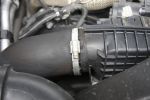
Air Box Jubilee Clip730 viewsLoosen to allow air inlet pipe to be removed from the air box
|
|
![Filename=kit804-trim-clip-selection-box-discovery-3-4-rrs-frelander-2-evoque-1238394-p[ekm]270x172[ekm].jpg
Filesize=16KB
Dimensions=270x172
Date added=07.Feb 2019 kit804-trim-clip-selection-box-discovery-3-4-rrs-frelander-2-evoque-1238394-p[ekm]270x172[ekm].jpg](albums/userpics/33392/thumb_kit804-trim-clip-selection-box-discovery-3-4-rrs-frelander-2-evoque-1238394-p%5Bekm%5D270x172%5Bekm%5D.jpg)
Thread upload4 viewsImage uploaded in new thread
|
|
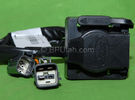
Harness section that runs behind the rear bumper.405 viewsThis is the harness section that clips up inside the rear bumper and includes the circular 7 pin, (6 flat +1 round), NAS socket, and also the 4 pin NAS flat connector.
The two small plug ends connect under the rear left tail light to the harness section that exits from the interior.
The Land Rover part number for the NAS trailer tow kit, (both cables), is YWJ500220.
|
|
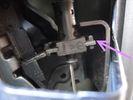
48 views
|
|

Fixing method10 viewsStainless Jubilee clip to mount electrics box to winch post
|
|

Thread upload0 viewsImage uploaded in thread 206858
|
|

Thread upload0 viewsImage uploaded in thread 206858
|
|

LR3 Air Conditioner Drain Tubes behind centre console2091 viewsThis shows the two air conditioner drain tubes located left and right under the radio stack.
The tube on the left side, (steering wheel side, LHD), disattached itself and the carpet on the floor under the gas pedal etc became soaked. I think rain water from outside that comes in the outside cowl vents also exits via the tubes as I first noticed the carpet was wet after parking outside during a big rain storm.
It was relatively easy to slide up and reattach the rubber hose that runs from the rectangular shaped plastic discharge hole(s) of the heater "pan" down along the transmission hump area and thru the floor pan. There is a hose on each side of the transmission hump, but only one hose had let go on my 3. The rubber hoses just slide over the rectangular plastic openings of the two heater housing drain outlets.
To get at each drain hose, remove the vertical sort of triangle carpeted piece below each side of the radio stack. The triangles of carpet will just pull away as each is held on with those metal U clips Land Rover so likes. Dislodge each triangle at least sufficiently to get ones hand in to slide the rubber hose back on.
You will rarely see AC water on the ground as the front drains pour onto a metal underside protection skid plate and the rear drain onto the top of the left rear muffler.
|
|

Lunar Eclipse as seen from Tunisian Desert on 15 Aug 2008 outside my D354 views
|
|

Thread upload11 viewsImage uploaded in thread 135120
|
|
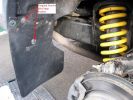
Fitting Land Rover Series 3 Rear Mud Flaps to a Disco 3/4 - A955 viewsUsed Original Screws plus two extras, Had to cut around exhaust. Once first done, laid them back to back and used first as a template to drill and cut second. Used a 5.5mm drill for the holes in the flap for the original screws and a 7mm drill to make the new holes in the plastic wheel-arch trim and lining to take the two-part trim clip (see my gallery for a picture of this style clip) - this photo of the new flap shows two screws but I modified that design to avoid using screws which corrode with time. Ignore the fact the pics are taken on a D3 Coiler, it makes no difference.
|
|

87 viewsI clipped a wallaby\'s tail -on dusk and in rain. There was no apparent damage upon initial inspection - however the flood light surround trim must have fell out on the return trip home.
|
|
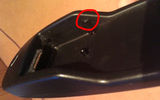
Nokia phone cradle CR3 - missing clips31 views
|
|
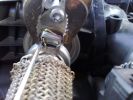
EGR182 views
|
|
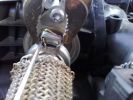
Pipe clamp EGR176 views
|
|
Thread upload16 viewsImage uploaded in thread 170233
|
|
88 viewspremium tweeter before being fitted in recess where old "base" one was. Tweeter clips in place and is also secured with glue (hot gun) as LR do.
|
|

236 views
|
|

Thread upload2 viewsImage uploaded in thread 198799
|
|

broken clips215 views
|
|
remove metal clips from floor panel and reinstall on to the plastic trim293 viewsIf you leave the clips in place and try to force the trim back in the clips are knocked through the floor unit and it takes an hour to get them out!!
|
|
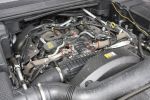
EGR Pipe Clips820 viewsRemove the 2 circled clips to disconnect upper ends of EGR pipes from the stub pipes fitted to the EGR butterfly valve housing.
|
|

200 views
|
|
Thread upload7 viewsImage uploaded in thread 206013
|
|
Thread upload17 viewsImage uploaded in thread 170233
|
|

clip on light37 viewsthread here
http://www.disco4.com/forum/post817944.html#817944
|
|
Door Card Removal - Top clips22 views
|
|
Thread upload4 viewsImage uploaded in new thread
|
|
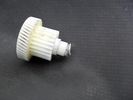
The faulty unit (secondary gear / torque clutch)371 viewsShowing the inadequate circlip retaining land, ripped iopen by the normal spring tension. Should never have been made of plastic...
|
|
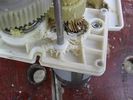
Gear box casing showing wear from screaming friction...407 views...once the circlip has bust through the inadequate retaining land, the spring presses on the (other) gearbox casing, forcing the secondary gear to wear on the gear box casing where shown, there being no adequate provision for end-thrust (even though helical gearing would mandate that, to cope with the NORMAL axial vector forces produced) resulting from spring pressure on the other gearbox casing face pushing the gear into this face.
|
|
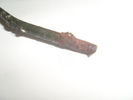
Brake pipe69 viewsCorroded where the clip had held it on
|
|
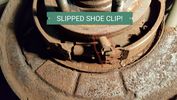
Thread upload1 viewsImage uploaded in thread 195714
|
|
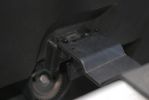
Releasing A-bar Strap319 views
|
|
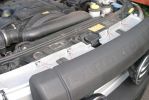
Front Grill Removal405 views
|
|
Front Grill Removal320 views
|
|
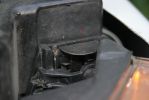
Headlamp fixed361 views
|
|

26 views
|
|
Thread upload13 viewsImage uploaded in new thread
|
|
Thread upload13 viewsImage uploaded in new thread
|
|

Short clip number 2, bit wobbly but my 7 year old was filming!547 views
|
|

Short clip, bit wobbly but my 7 year old was filming!458 views
|
|

Two-part trim clip463 viewsThis is what I used to fix the Large Rear Mud flaps instead of my first attempt with screws - these actually cameof the vehicle when I fitted RLD's rock sliders
|
|
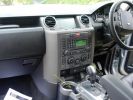
Dash trim removal577 viewsClips are at the bottom only, so pull (very hard) at the bottom and pull towards the gear lever.
|
|

Thread upload2 viewsImage uploaded in new thread
|
|

Thread upload7 viewsImage uploaded in new thread
|
|
Thread upload10 viewsImage uploaded in thread 128427
|
|
2 views
|
|
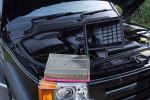
Removing air box is very easy, some screws and just loosen the jubilee clip around the air pipe147 views
|
|

Thread upload6 viewsImage uploaded in thread 192621
|
|
23 views
|
|
|
|
|
|
|