| Search results - "detailed" |
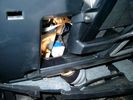
Brake Switch Visible thru Opening4933 viewsThe blue and white bit is the switch; the sort of gold appearing box,(it is really black), you will not see in your 3 as it is a Smooth Talker brand amplifier for my Blackberry phone antenna. This install is detailed in the SmoothTalker phone antenna section of my gallery.
One way to remove and install the switch is to lower the "horizontal" panel above the brake pedal as shown where the flashlight head is located. To actually remove the switch, you slide your hand thru the gap and rotate the switch clockwise 1/4 turn while watching thru the rectangular opening. Installation of the new switch is the reverse of above - 1/4 turn counterclockwise.
Before you remove the switch, note its orientation - horizontal with electrical wires to the left. That is the way it should look after replacement as well.
The second time I replaced the switch, I did it all thru the rectangular opening and did not remove the horizontal panel - that is experience helping out.
The knee kick you have to remove regardless. It is sort of hinged at the bottom so you just pull at the top and sort of rotate the knee panel and then pull upwards for two plastic "fingers" to clear the slots they reside in.
|
|
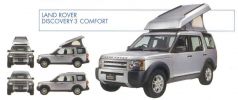
Land Rover Discovery 3 'Comfort' - Detailed views405 viewsCopied from Land Rover Magazine Number 40 (Japanese edition)
|
|

Thread upload11 viewsImage uploaded in new thread
|
|

disco3.co.uk instructions for removing wheelarches (with photos)641 viewsCourtesy of a senior member of the site - detailed instructs for removing the wheelarch trims and front bumper - use in conjunction with the other 2 documents
|
|

Thread upload0 viewsImage uploaded in thread 204567
|
|

Thread upload1 viewsImage uploaded in thread 204567
|
|
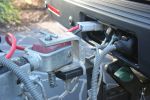
780 viewsDetailed view of hitch and Anderson plug
|
|

NAS 7 Blade Round plus NAS 4 Pin Flat Vehicle end Socket522 viewsThis shows the function of each blade when looking into the connector at the vehicle end for the 7 pin NAS plug. The layout is the pin order for most new North American pickup trucks and the LR3/4.
The colour and gauge of the wires feeding into the back of the plug varies even within manufacturer model lines.
Also detailed is the flat 4 pin layout common on smaller trailers not having electric brakes. This includes most U-Haul rental trailers.
|
|
214 viewspolished in detail
|
|

Cranking voltage new battery17 viewsDetailed measurement numbers of the new.jpg file.
|
|

close up408 viewsdetailed poor fit
|
|

Siemens VDO Piezo Common Rail injection PCR 2.313 viewsDetailed information about te sort of injection system in the Disco 3
|
|
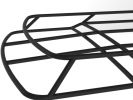
Detail view of sunroof version262 viewsDetailed view of front section of the sunroof version of our Discovery 3/4 Expedition roof rack
|
|
|
|
|
|
|