| Search results - "kit" |

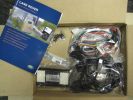
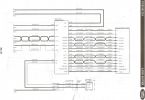
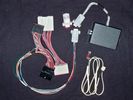
0000 LR Bluetooth dealer Kit install instructions1584 viewsThis 17 page pdf is mostly a series of pictures showing how to install the original Land Rover dealer installed Bluetooth kit for circa 2005 / 2006 three's. Also included are three wiring diagrams sheets related to the pairing code 0000 Bluetooth install.
This pdf is useful if you are now removing the 0000 kit to install the optical 2121 MOST D4 module, an easier install than the 0000 kit ever was.
|
|
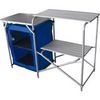
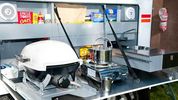
kitchenette it is.908 viewsEjoying Baguette, Saucison sec and of course Fois Gras.
|
|
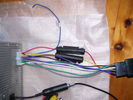
Rear of DD kit69 views
|
|
84 viewsTool kit ready..............
|
|
219 viewsTool Kit ready..............
|
|
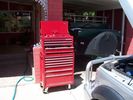
147 viewsThe real tool kit ready
|
|
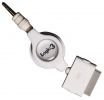
Ipod Kit85 views
|
|
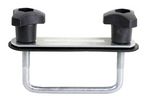
32 viewsHalfords fitting kit
|
|
Thread upload7 viewsImage uploaded in new thread
|
|
Uncle Ray\'s Kit936 views
|
|
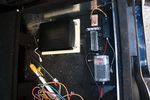
96 viewsDeciding on a layout for the electrical stuff. Bottom right of pic is a fusebox which will take the input power from the traxide kit, then relay box and 12V regulator, ignition busbar and homemade regulated 12V busbar. Big black box is the CarPC
|
|

G4 kayak kit 36 views
|
|
G4 kayak kit --7.5cm / 3 inch 35 views
|
|
ANITAS suspension module kit73 views
|
|
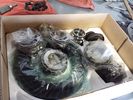
Locking Kit626 viewsready to install
Mfd from https://www.facebook.com/DifferentialPartsUS
|
|
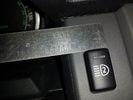
Light Kit switch2017 views
|
|
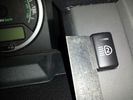
Light Kit switch1111 views
|
|
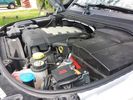
Winch Power upgrade306 viewsUsing 2 warn kits, and removing one of the wires to use on another project. The purpose was to replace the power and ground wire. I used Warn kits, which are 4/0 Welding cable. The original red #4 warped from getting a little too worn. The 2nd
Battery #1 Deka 9A94 AGM Intimidator, Battery #2 Deka 9A47 AGM Intimidator WARN 36080 28" Quick Connect Cable X 2, WARN 26405 Quick Connect Cable 7' X 2, WARN 15901 Black Cable X 1 -- winch control 72" X 1 https://www.facebook.com/DifferentialPartsUS
|
|
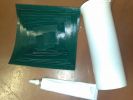
Contents of repair kit151 views
|
|
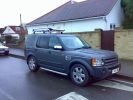
309 viewsThule Xpedition 821 Luggage Basket fitted to 861 Aerobars on 751 Feet with 3027 Fitting Kit. All in £360.00
|
|
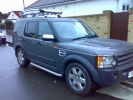
310 viewsThule Xpedition 821 Luggage Basket fitted to 861 Aerobars on 751 Feet with 3027 Fitting Kit. All in £360.00
|
|
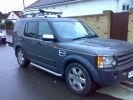
305 viewsThule Xpedition 821 Luggage Basket fitted to 861 Aerobars on 751 Feet with 3027 Fitting Kit. All in £360.00
|
|
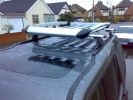
299 viewsThule Xpedition 821 Luggage Basket fitted to 861 Aerobars on 751 Feet with 3027 Fitting Kit. All in £360.00
|
|
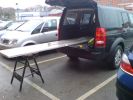
291 viewsNeeded 1.8m of worktop but had to buy 3m length. Took B&D workmate with me and cut it down to size in the car park! Notice how the workmate is exactly level with D3 in normal height!
|
|
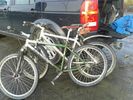
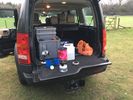
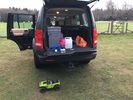
What 4x4's are for ...150 viewsThrowing a bunch of kit in back of an taking it places.
|
|
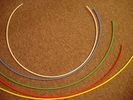
6mm Heat Shrink colours 362 viewsI decided to colour code the tubing so I used 6mm electrical heat shrink.
As there is no apparent colour coding re the 3, I tried to emulate the P38 coding; #1 LR red, #2 RR blue, #3 LF yellow, and #4 RF green. This was not doable as both left side air springs have green coloured tubing coming off the top of the front and rear air springs. I therefore arbitrarily chose the Left Rear to be red; Left Front green; Right Front yellow; Right Rear blue; and for the air compressor supply line, White coloured heat shrink. Since two new lines tie into each air spring line, I made the line between the air spring and the FASKIT, a single solid colour, and the line from the FASKIT to the valve block, White, plus the related appropriate solid colour.
|
|

Thread upload1 viewsImage uploaded in thread 206090
|
|

Thread upload1 viewsImage uploaded in thread 171694
|
|

Thread upload13 viewsImage uploaded in new thread
|
|

Thread upload10 viewsImage uploaded in new thread
|
|

Land Rover Aerial Fin images for both Glass and Metal Roof Disco3 / LR3850 viewsAs well as the two different fins, this pdf also shows the plastic blanking plate for glass roof vehicles where no fin is installed.
The glass roof fin is secured by two security screws from the top into a plastic frangible glue on gasket. The hope is that when struck, the fin will shear off and not crack the glass roof. Re the metal roof design, the fin is secured from underneath via two nuts.
The pdf also shows the various electrical bits related to the antennas. In the UK, the fin would house not only a cell phone antenna but the TV and satellite radio antenna electronics as well; in the States, the Sirius sat radio antenna and a G type cell phone antenna if the phone kit was installed would reside within the fin. The SAT NAV GPS antenna is located within the High Mount Brake Light plastic mounted to the upper rear hatch.
|
|

Fin cell phone aerial drawing190 viewsThe factory aerial for the factory NAV / GPS on my 2005 HSE is within the high mounted stop light lens at the top of the upper hatch door. I do not have the factory installed phone kit, and as such, do not have the fin installed; instead there is just a plastic blanking insert to fill the cell phone aerial wiring hole in the metal portion of the roof; hence this requirement for an "external" cell antenna. For those that do have the fin on their glass roof, the fin is screwed on to a glued on plastic gasket, (sort of), and not bolted thru as per the metal roof 3's.
|
|
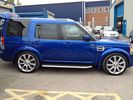
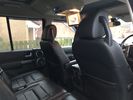
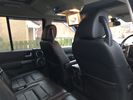
FOR SALE - ONE OFF Land Rover Disco 3 37 viewsOne of a kind Landrover Discovery TDV6 HSE LUX Model 5 door automatic 4x4 diesel evo blue. Upgrades: sidesteps, roof rails, privacy glass, front and rear heated seats/elec seats, landrover tv and headphones, 7 seater black leather, piano black dash/steering wheel, built in fridge, 6 disc changer, sat nav and bluetooth, harman kardon premium entertainment pack, by-xenon adaptive headlights , cruise control and front and rear park distance control, panoramic electric glass roof, 22inch alloy wheels, body kit
|
|

43 views
|
|
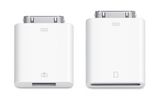
iPad Camera Kit19 views
|
|

17 views
|
|
Thread upload0 viewsImage uploaded in thread 173579
|
|
Thread upload1 viewsImage uploaded in thread 180713
|
|
![Filename=ba2236-air-to-coil-conversion-kit-discovery-3-931977-p[ekm]170x113[ekm].jpg
Filesize=3KB
Dimensions=170x113
Date added=20.Sep 2017 ba2236-air-to-coil-conversion-kit-discovery-3-931977-p[ekm]170x113[ekm].jpg](albums/userpics/33392/thumb_ba2236-air-to-coil-conversion-kit-discovery-3-931977-p%5Bekm%5D170x113%5Bekm%5D.jpg)
Thread upload9 viewsImage uploaded in new thread
|
|
Thread upload10 viewsImage uploaded in new thread
|
|

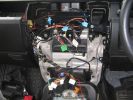
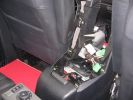
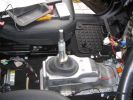
Blanking Kit Fitting Procedure2440 viewsHow I fitted the kit to my D3.
|
|

Thread upload1 viewsImage uploaded in thread 184728
|
|
1826 views
|
|
1603 views
|
|
1507 views
|
|
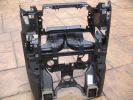
1449 views
|
|
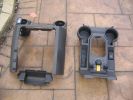
1348 views
|
|
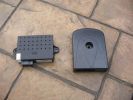
1502 views
|
|
1130 views
|
|
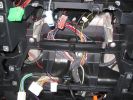
1398 views
|
|
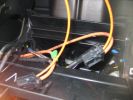
253 views
|
|
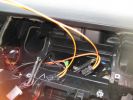
251 views
|
|
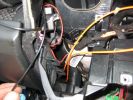
256 views
|
|
240 views
|
|
289 views
|
|
Bodykit front / Evoque 20" Wheels79 views
|
|

Bodykit DRL68 views
|
|
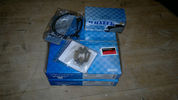
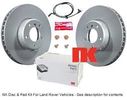
Brake Kit Front14 views
|
|
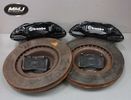
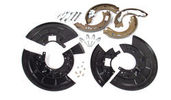
Brake Kit Rear14 views
|
|
Thread upload1 viewsImage uploaded in new thread
|
|
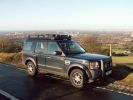
The Blue Beastie fully kitted out overlooking Manchester128 views
|
|
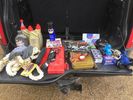
Trip kit12 views
|
|
Thread upload4 viewsImage uploaded in new thread
|
|
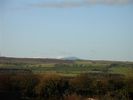
The Cheviot from my Kitchen32 views
|
|
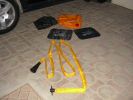
The kit as supplied180 viewsContains carry bag, 2 protector mats, exhaust jack and 7m reinfoced woven hose with bayonet connector to bag (inc non-return valve) and rubber cone for exhaust fitting
|
|
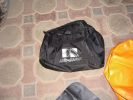
The bag all the kit comes in161 viewsDM Exhaust jack carry bag
|
|
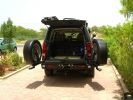
Rear end open329 viewsEccentric latch clamps for wheel carriers are very strong. No rattles on graded roads. Canvas seat covers from \'Escape\' in SA on rear jump seats can be seen, and Front Runner Wolfpack storage boxes - great for toolkit, winch and recovery straps etc.
|
|
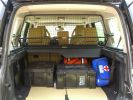
Load space366 viewsShows the SA Front Runner Wolfpack stacking plastic storage boxes that I keep laod straps etc in and the 2nd is tool kit, spare belts, jerry can funnel and tools, plus airline and tyre inflator/deflaotr for ARB on-board compressor, HD jump leads. ARB Winch pack (Orange)with strops, snatch blocks, shackles, gloves, and 2 ARB recovery dampers. Really great 4x4 1st Aid kit from Outdoors warehouse in SA. LRs own loadspace guard - not the best design if you want to store a long load. Mods to be carried out!
|
|
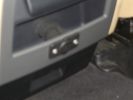
Auxiliary power sockets - TracTronics, Australia381 viewsA complete kit including two outlets, wiring etc connected to auxiliary Optima Blue top battery using their very effective SC40 split charge relay. One outlet between rear and front seats, and 2nd alongside loadspace 12v outlet, enables fridge to run when engine is not running, without affecting start capacity or vehicle functions.
|
|

Commercial Kit Bolt68 views
|
|
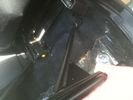
commercial kit bracket behind driver seat60 views
|
|

Commercial Kit bracket 262 views
|
|
Commercial Kit bracket 160 views
|
|
Thread upload1 viewsImage uploaded in thread 204346
|
|
31 views
|
|
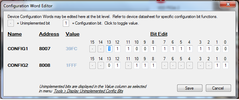
Thread upload24 viewsImage uploaded in thread 106191
|
|

Thread upload6 viewsImage uploaded in thread 106191
|
|

Cooling system hoses - 4.4L petrol V81098 viewsThese are the cooling system hoses on the 4.4L petrol V8. The little odd shaped bleeder hose, (LR006158), shown in the top right hand corner can give problems. There is a plastic tee with a threaded air bleeder outlet located in the middle of the hose. The plastic tee can or will fail due to I guess heat distress.
A BIC pen can serve as a field fix, however for your parts kit, a nominal 3/8" ID hose size brass hose barb inline connector plus a couple of hose clamps is suggested. Better yet is a threaded hose barb brass coupling or a tee and bleeder valve to allow bleeding of the line. Land Rover now makes the plastic bleeder valve that breaks available as a separate part, # LR027661, where 0 is a zero. As such, one can now purchase that part only for addition to your field fix parts kit.
|
|

This is what happens when you go too deep in a Discovery!570 viewsMy friend Dave was driving Strata Florida, after heavy rain. The Disco 200tdi was kitted for wading, with snorkel etc, but this demonstrates what happens when you submerge the bonnet.
|
|
Thread upload9 viewsImage uploaded in thread 167933
|
|

biskit first in49 views
|
|

Biskit tunes it the trees45 views
|
|

biskit 3 wheels50 views
|
|

Biskit first in again i fear there is a pattern forming53 views
|
|

at least you are not alone biskit60 views
|
|
293 views
|
|
Thread upload20 viewsImage uploaded in new thread
|
|
Picture of Height sensor borrowed from D3Matt238 views
|
|
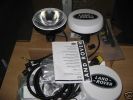
Discovery 4 Driving Lamps Kit - VPLAV0019360 views
|
|
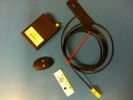
86 views
|
|
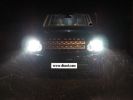
D4 hid kit installed and outside in the dark 6000k conversion.284 views
|
|
D4 hid kit fitted NO FAULTS211 views
|
|
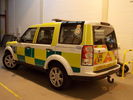
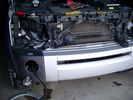
D4 Being Prepped for LAS26 viewsThis is a Disco 4 (unknown spec) being prepped up at my workplace for the LAS, having new comms kit put in and stuff. What you can't see from this angle is that the front grille and headlights have been taken out.
|
|
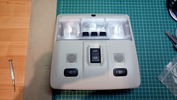
Roof console with mounted switches146 viewsOne switch is for switching the R-750 spot lamps, the other is for additional external lighting using a second Relay kit provided by OEM Plus.
|
|

Thread upload11 viewsImage uploaded in new thread
|
|
Thread upload11 viewsImage uploaded in thread 159643
|
|
Thread upload11 viewsImage uploaded in new thread
|
|

Thread upload11 viewsImage uploaded in new thread
|
|

Thread upload11 viewsImage uploaded in new thread
|
|
Thread upload11 viewsImage uploaded in new thread
|
|
Thread upload11 viewsImage uploaded in new thread
|
|

Thread upload11 viewsImage uploaded in new thread
|
|

Thread upload11 viewsImage uploaded in new thread
|
|

Thread upload11 viewsImage uploaded in new thread
|
|

Thread upload11 viewsImage uploaded in new thread
|
|

Thread upload11 viewsImage uploaded in new thread
|
|

Thread upload11 viewsImage uploaded in new thread
|
|
Thread upload9 viewsImage uploaded in thread 176760
|
|
Thread upload9 viewsImage uploaded in thread 176760
|
|
Thread upload11 viewsImage uploaded in thread 176760
|
|
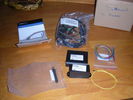
53 viewsDanhag FBH Kit
|
|

DDin Xtron kit first fit - slight adjustments needed top and bottom.101 views
|
|
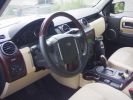
Wood kit from Apsis USA498 views
|
|
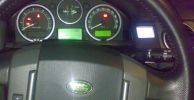
ipod detail159 viewsipod mounted without lr´s ipod kit. A cable cames from HK back aux input.
|
|

Diff Kit75 viewsAll you need to change the oil in your front diff.....
|
|
65 views
|
|
HEVAC148 views
|
|
Thread upload4 viewsImage uploaded in thread 157786
|
|

52 views
|
|
clearout driving light fitting kit4 views
|
|
clearout DRL kit4 views
|
|
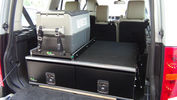
Ironman Drawers and Fridge Slide111 viewsI hate kitsets, over 100 bolts to assemble this unit and lost gallons of sweat, must have read the instructions a hundred times or more but final product does not look so bad. A few bolts hanging out the sides of both slide and drawers that may catch things so time will tell if I made the correct purchase.
Maybe one day I will make some side wings to cover the sides properly.
|
|

white kite in flight32 views
|
|
Belkin kit for I pod249 views
|
|
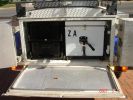
first step opening kitchen172 views
|
|
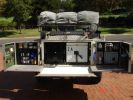
Kitchen open, fridge on right, drawers on left220 views
|
|
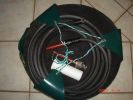
The Takla kit. You get a puncture repair kit too171 views
|
|
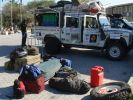
Babu - great guy from Mozambique who joined Kingsley\'s core team.150 views"How the heck am I gonna fit all that in there?!"
Packing all the kit in Ondangwa. Amazing what you can get into a Defender!
|
|

Filling up and final kit checks at the BP in Ondangwa181 views
|
|
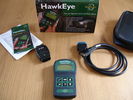
D3 Hawkeye Kit Complete42 views
|
|
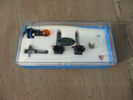
Bulb kit0 views
|
|
Bulb kit0 views
|
|
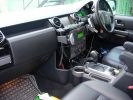
Piano black dash kit and Brodit proclip mounts681 views
|
|
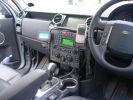
Piano black dash kit and Brodit proclip mounts585 views
|
|
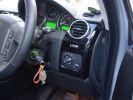
Piano black dash kit571 views
|
|
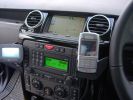
Piano black dash kit and Brodit proclip mounts611 views
|
|
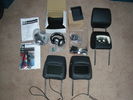
Full kit including FL2 & D3 headrests79 views
|
|
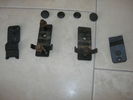
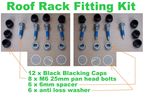
A Bar fixing Kit169 views
|
|
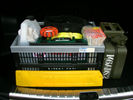
Winter Kit89 views
|
|
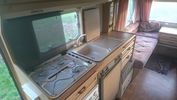
3 burner hob, new kitchen taps97 views
|
|
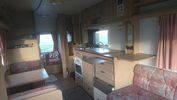
Spacious Interior, plenty of kitchen working space105 views
|
|
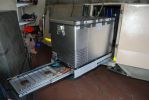
built fridge slider in front door (as opposed to rear) which makes fridge available at the kitchen. Also added drawer for gas stove - stows easily under the fridge when not in use. can be used independantly of fridge, ie. whether fridge is pulled in or ou113 views
|
|
Attached Front Runner table to outside kitchen door96 views
|
|
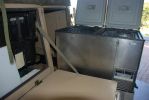
116 viewsthis shows the fridge on the 2 x 180kg sliders. i had to slightly modify the door opening to fir the fridge hinges thru. I just gently bent it, and fitted additional seals, hence it can easily be returned to standard. having the fridge in the kitchen is a major bonus, plus the back door of the trailer is now used for easy access to the cavernous interior, whereas prior to this youhad only access thru the front doors, which are only 500mm wide
|
|
Thread upload18 viewsImage uploaded in new thread
|
|

11 views
|
|
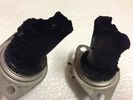
EGR Stub Pipes13 viewsThis what they looked like after 15K Km
Glad I fitted the Blanking kit
|
|
Thread upload13 viewsImage uploaded in thread 111243
|
|
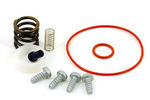
EPB kit spare springs33 views
|
|

EPB wiring kit42 views
|
|
77 views
|
|
Thread upload21 viewsImage uploaded in thread 123657
|
|
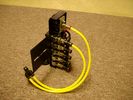
FASKIT on end view 859 viewsEnd and rear view of the FASKIT. Yellow lines are as shipped for hooking to the air supply; one line to valve/filler and other is to gauge. I will modify the arrangement to delete one of the yellow lines such that gauge line plugs into where the second yellow line is right now,(will be only one yellow tube), and then the air source line will plug into the port controlled by the valve, (hidden in this view but visible in other view). When white valve is in the ON position, gauge will read air source pressure, and be available to supply air to any of the selected four air springs. When valve is closed, the gauge will show individual air pressure in each of the air springs when a jumper is run between the gauge Schrader valve and the appropriate air spring Schrader valve.
|
|
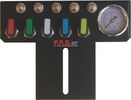
FASKIT air panel unmounted836 viewsThis is the manual air valve panel that is mounted in the "empty" space where the FBH normally resides. The gauge reads to a maximum of 25 Bar. The air tank relief valve is set just over 16.5 Bar (240 psig); the front air springs run maybe 9 Bar, (130 psig) and the rear, somewhat less, perhaps between 5 and 8 Bar. (70 to 115 psig). Max theoretical air spring pressure at full compression due to a big bump and full gross is approximately 27 Bar (390 psig).
|
|
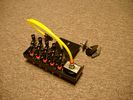
FASKIT rear showing gauge.918 views
|
|
Thread upload20 viewsImage uploaded in thread 156161
|
|
96 views
|
|
Thread upload22 viewsImage uploaded in new thread
|
|
Thread upload6 viewsImage uploaded in thread 140524
|
|
119 viewsfront view
|
|
![Filename=front-rear-disc-upgrade-kits-to-v8-size-12793-c[ekm]170x140[ekm].jpg
Filesize=6KB
Dimensions=170x140
Date added=17.Sep 2018 front-rear-disc-upgrade-kits-to-v8-size-12793-c[ekm]170x140[ekm].jpg](albums/userpics/33392/thumb_front-rear-disc-upgrade-kits-to-v8-size-12793-c%5Bekm%5D170x140%5Bekm%5D.jpg)
Thread upload4 viewsImage uploaded in thread 135978
|
|

fukitol125 views
|
|

magic pill468 views
|
|
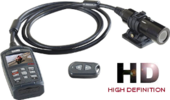
Professional HD Motorsport camera kit77 views
|
|
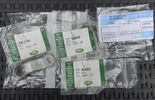
8 views
|
|
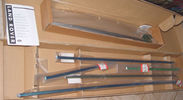
For Sale Grill 46 views
|
|

FBH kit55 views
|
|

FBH GSM Kit Installation Guide61 views
|
|
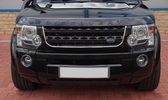
Thread upload7 viewsImage uploaded in new thread
|
|
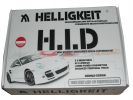
D4 HID helligkeit 6000k kit171 views
|
|

Thread upload9 viewsImage uploaded in new thread
|
|

Reversing camera sat nav land rover instructions hids4u503 viewsReversing camera retrofit on land rover lexus jaguar and many other cars. Display image on the sat nav lcd screen
|
|

Thread upload21 viewsImage uploaded in thread 123657
|
|

Stainless Steel Accessory Instructions354 views
|
|

Rear Spoiler Fitting Instructions LR130 views.
|
|

FL2 MOST Bluetooth Instalation Instructions95 views
|
|

Tailgate Spoiler166 views
|
|

Kit contents61 views
|
|

Kit contents55 views
|
|

Kit contents55 views
|
|

Kit contents62 views
|
|

Kit contents53 views
|
|

Kit contents55 views
|
|

Kit contents51 views
|
|
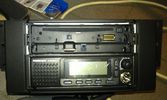
72 viewsThe Pioneer DEH X9500BT on top with the CB President Johnson II beneath.
I had to cut the bottom part of the CB 2 DIN conversion kit in order to have the supplied cover with the facia in place as it should.
I eventually didn't use the supplied facia of the radio as it's bottom part was covered by the CB's kit.
|
|
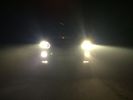
Led conversion kit52 views
|
|
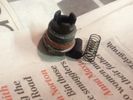
Valve Kit22 views
|
|

Relay kit9 views
|
|
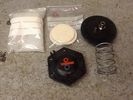
Dryer Kit24 views
|
|

Relay kit 214 views
|
|
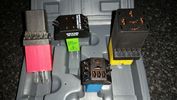
Relay kit 310 views
|
|

Stihl kit18 views
|
|

Makita BL128 views
|
|

Makita BL226 views
|
|

Makita BL325 views
|
|

Makita BL428 views
|
|

Makita BL522 views
|
|

Makita BL626 views
|
|

Makita Winch22 views
|
|

Tool Kit and Extending Bar15 views
|
|

Iphone kit4 views
|
|
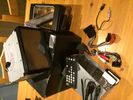
Xtron ddin kit14 views
|
|
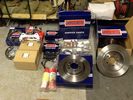
V8 Kit21 views
|
|

Makita knot and nail 220 views
|
|

Makita knot and nail 117 views
|
|

only full size pic with all the kit but covered in snow7 views
|
|
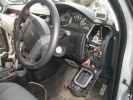
939 viewsFitting Nokia 810 car kit and fog light switch
|
|
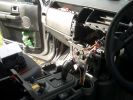
854 viewsFitting Nokia 810 Phone kit
|
|
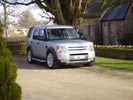
2005 D3 with New Bodykit (from TLO).444 viewsJan 2010
One of the last body kits bagged from TLO in Jan 2010... colour-coordinated in Zambezi Silver by local spray shop... Left the centre section Brunel silver for contrast. Really pleased with the resulting look.
Sadly missed
|
|
Sony kit7 views
|
|
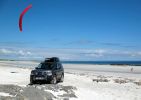
Kites Up at Crossapol575 views
|
|
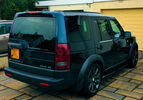
Almost there61 viewsA couple of other tweaks to add to the D Wagon and she will be as I want her. Still to match the side vent and Supercharger grill paint and considering a rear bumper valance and twin exhaust kit conversion. That should do the "Anti-Bling" nicely.
|
|
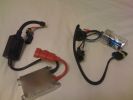
Hid Kit128 views
|
|

Matt Black Porsche seen in Vienna41 viewsnote the body kit and the paint but the best bit is the cable tie keeping the number plate on.
|
|

A nice piece of kit...349 viewsOne piece of kit I bought for myself. A backpack big enough for one of those 17" MacBook Pro from Apple which does also possess some solar panels to recharge the batteries in my Treo, my BT GPS or iPod. Convenient for when I am NOT in the car... Here the background is an armored Toyota... No Landies around ! :-(
|
|

Defa WarmUp Comfort Kit 210028 views
|
|

Defa WarmUp Comfort Kit 210042 views
|
|

Wurt Plastic repair kit used as glue.32 views
|
|
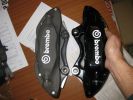
Brembos - FFRR vs RRS 01131 viewsHaving acquired the wrong calipers and discs initially, I purchased the correct RRS kit from TLO. Useful picture - the light grey calipers show that the FFRR has a smaller offset mounting point and smaller diameter threaded holes. The glossy calipers are for RRS and fit D3 perfectly with correct offset and M15 mounting holes.
|
|
Atlas Mountains ..........and the kitchen sink45 views
|
|
Atlas Mountains ..........and the kitchen sink706 viewsCalendar 2008 entry
|
|
5 viewsBlown turbo hose causing the engine to cut out every time you try and over take or climb a hill. Have a new Samco kit to go on at some point.
My super bodge works a treat.
|
|

Body Kit Bumper & Arches Fitted101 views
|
|

Kitzsteinhorn, Kaprun, Austria82 views
|
|

Diff Recon kit21 views
|
|
H7R land rover HID Kit78 views
|
|

Complete kit13 views
|
|
Brukit 7 views
|
|
Brukit8 views
|
|
Brukit7 views
|
|
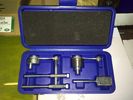
Britpart cambelt locking kit9 views
|
|
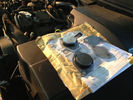
BAS Reemap UK EGR Valve blanking kit 16 views
|
|

airbox with EGR blanking kit installed 16 views
|
|
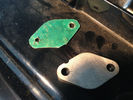
BAS Remap UK blanks for the EGR's 18 viewsnotice i also added a garage made seal, just to make sure there are no problems
|
|

Thread upload8 viewsImage uploaded in thread 199969
|
|
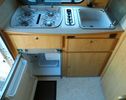
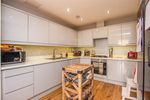
Kitchen20 views
|
|

M42 J6 Airport turn196 viewsAll kitted up
|
|
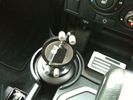
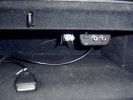
Ipod Lead73 viewsIpod Integration kit - lead comes out of dash at bottom of console.
|
|
109 views
|
|

Thread upload11 viewsImage uploaded in new thread
|
|

Thread upload12 viewsImage uploaded in new thread
|
|
Thread upload0 viewsImage uploaded in new thread
|
|
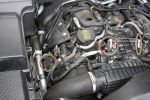
EGR Blanking Kit Fitted.935 viewsLook, no EGR pipes. The circled bits are the new blanks.
|
|

71 views
|
|
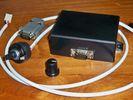
New switch182 viewsRotary switch and module box
|
|

Thread upload22 viewsImage uploaded in thread 133069
|
|

Thread upload4 viewsImage uploaded in thread 143080
|
|
Thread upload22 viewsImage uploaded in thread 104629
|
|

Thread upload1 viewsImage uploaded in new thread
|
|

Thread upload10 viewsImage uploaded in new thread
|
|
![Filename=kit100c-castrol-mahle-service-kit-discovery-range-rover-sport-2_7-tdv6-to-vin-6a-2006-1240829-p[ekm]233x270[ekm].jpg
Filesize=28KB
Dimensions=233x270
Date added=01.Mar 2019 kit100c-castrol-mahle-service-kit-discovery-range-rover-sport-2_7-tdv6-to-vin-6a-2006-1240829-p[ekm]233x270[ekm].jpg](albums/userpics/33392/thumb_kit100c-castrol-mahle-service-kit-discovery-range-rover-sport-2_7-tdv6-to-vin-6a-2006-1240829-p%5Bekm%5D233x270%5Bekm%5D.jpg)
Thread upload3 viewsImage uploaded in new thread
|
|
Thread upload21 viewsImage uploaded in thread 104629
|
|

Thread upload0 viewsImage uploaded in new thread
|
|
Thread upload0 viewsImage uploaded in new thread
|
|
Thread upload21 viewsImage uploaded in thread 104629
|
|

Thread upload1 viewsImage uploaded in new thread
|
|
![Filename=kit370d-delphi-premium-front-disc-pad-kit-discovery-3-rrs-2_7-1150629-dv-p[ekm]261x270[ekm].jpg
Filesize=23KB
Dimensions=261x270
Date added=09.Mar 2018 kit370d-delphi-premium-front-disc-pad-kit-discovery-3-rrs-2_7-1150629-dv-p[ekm]261x270[ekm].jpg](albums/userpics/33392/thumb_kit370d-delphi-premium-front-disc-pad-kit-discovery-3-rrs-2_7-1150629-dv-p%5Bekm%5D261x270%5Bekm%5D.jpg)
Thread upload12 viewsImage uploaded in new thread
|
|
![Filename=kit380-discs-pads-calipers-carriers-front-brake-overhaul-kit-kit-all-discovery-3-2_7-4_0-1231428-p[ekm]270x250[ekm].jpg
Filesize=21KB
Dimensions=270x250
Date added=25.Sep 2018 kit380-discs-pads-calipers-carriers-front-brake-overhaul-kit-kit-all-discovery-3-2_7-4_0-1231428-p[ekm]270x250[ekm].jpg](albums/userpics/33392/thumb_kit380-discs-pads-calipers-carriers-front-brake-overhaul-kit-kit-all-discovery-3-2_7-4_0-1231428-p%5Bekm%5D270x250%5Bekm%5D.jpg)
Thread upload7 viewsImage uploaded in new thread
|
|
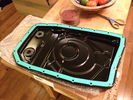
Thread upload23 viewsImage uploaded in thread 104629
|
|

Thread upload15 viewsImage uploaded in new thread
|
|

Thread upload3 viewsImage uploaded in thread 175095
|
|

Thread upload11 viewsImage uploaded in new thread
|
|
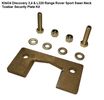
Thread upload15 viewsImage uploaded in new thread
|
|
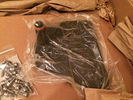
Thread upload22 viewsImage uploaded in thread 104629
|
|
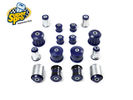
Thread upload1 viewsImage uploaded in thread 204346
|
|
![Filename=kit615-rear-upper-arms-kit-discovery-3-4-lr051622-lr051623-all-fittings-103244-p[ekm]270x194[ekm].jpg
Filesize=16KB
Dimensions=270x194
Date added=13.Jun 2019 kit615-rear-upper-arms-kit-discovery-3-4-lr051622-lr051623-all-fittings-103244-p[ekm]270x194[ekm].jpg](albums/userpics/33392/thumb_kit615-rear-upper-arms-kit-discovery-3-4-lr051622-lr051623-all-fittings-103244-p%5Bekm%5D270x194%5Bekm%5D.jpg)
Thread upload5 viewsImage uploaded in new thread
|
|
![Filename=kit616-rear-lower-arms-with-fitting-kits-discovery-3-4-air-suspension-only-1108062-p[ekm]270x210[ekm].jpg
Filesize=18KB
Dimensions=270x210
Date added=13.Jun 2019 kit616-rear-lower-arms-with-fitting-kits-discovery-3-4-air-suspension-only-1108062-p[ekm]270x210[ekm].jpg](albums/userpics/33392/thumb_kit616-rear-lower-arms-with-fitting-kits-discovery-3-4-air-suspension-only-1108062-p%5Bekm%5D270x210%5Bekm%5D.jpg)
Thread upload1 viewsImage uploaded in new thread
|
|

Thread upload2 viewsImage uploaded in new thread
|
|
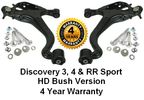
Thread upload0 viewsImage uploaded in new thread
|
|
![Filename=kit804-trim-clip-selection-box-discovery-3-4-rrs-frelander-2-evoque-1238394-p[ekm]270x172[ekm].jpg
Filesize=16KB
Dimensions=270x172
Date added=07.Feb 2019 kit804-trim-clip-selection-box-discovery-3-4-rrs-frelander-2-evoque-1238394-p[ekm]270x172[ekm].jpg](albums/userpics/33392/thumb_kit804-trim-clip-selection-box-discovery-3-4-rrs-frelander-2-evoque-1238394-p%5Bekm%5D270x172%5Bekm%5D.jpg)
Thread upload4 viewsImage uploaded in new thread
|
|
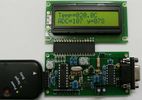
Thread upload29 viewsImage uploaded in thread 106191
|
|

Thread upload1 viewsImage uploaded in thread 163880
|
|

Thread upload3 viewsImage uploaded in thread 178074
|
|
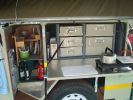
108 views
|
|

Thread upload8 viewsImage uploaded in new thread
|
|

Thread upload10 viewsImage uploaded in thread 133909
|
|

Thread upload14 viewsImage uploaded in thread 133909
|
|
Thread upload0 viewsImage uploaded in new thread
|
|

Thread upload10 viewsImage uploaded in thread 168258
|
|
34 views
|
|

Thread upload1 viewsImage uploaded in thread 159579
|
|
Getting around130 views
|
|

73 views
|
|
102 views
|
|
77 views
|
|

Parts from AF20 views
|
|
Thread upload1 viewsImage uploaded in thread 163880
|
|

PARKING_HEATER_UPGRADE_KIT30 viewsHow to upgrade the water piping
|
|

LA415-002 - Technical Bulletin - KIT Accessory DVD Poor Sound Quality56 views
|
|

LA419-002 - Technical Bulletin - KIT Accessory Phone Module Fault72 views
|
|
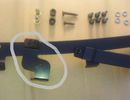
Thread upload3 viewsImage uploaded in new thread
|
|
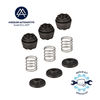
Thread upload0 viewsImage uploaded in thread 202927
|
|
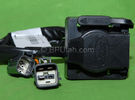
Harness section that runs behind the rear bumper.405 viewsThis is the harness section that clips up inside the rear bumper and includes the circular 7 pin, (6 flat +1 round), NAS socket, and also the 4 pin NAS flat connector.
The two small plug ends connect under the rear left tail light to the harness section that exits from the interior.
The Land Rover part number for the NAS trailer tow kit, (both cables), is YWJ500220.
|
|
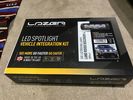
Thread upload3 viewsImage uploaded in thread 166460
|
|

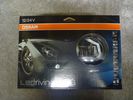
OSRAM DLR/FOGLIGHT Installation Manual27 views
|
|

Thread upload9 viewsImage uploaded in new thread
|
|
![Filename=ledfog201-osram-led-fog-lamp-kit-[2]-1142858-p[ekm]60x44[ekm].jpg
Filesize=1KB
Dimensions=60x44
Date added=17.Jan 2018 ledfog201-osram-led-fog-lamp-kit-[2]-1142858-p[ekm]60x44[ekm].jpg](albums/userpics/33392/thumb_ledfog201-osram-led-fog-lamp-kit-%5B2%5D-1142858-p%5Bekm%5D60x44%5Bekm%5D.jpg)
Thread upload9 viewsImage uploaded in new thread
|
|
![Filename=ledfog201-osram-led-fog-lamp-kit-[3]-1142858-p[ekm]60x39[ekm].jpg
Filesize=1KB
Dimensions=60x39
Date added=17.Jan 2018 ledfog201-osram-led-fog-lamp-kit-[3]-1142858-p[ekm]60x39[ekm].jpg](albums/userpics/33392/thumb_ledfog201-osram-led-fog-lamp-kit-%5B3%5D-1142858-p%5Bekm%5D60x39%5Bekm%5D.jpg)
Thread upload6 viewsImage uploaded in new thread
|
|

Left vent with Piano black dash kit fitted568 views
|
|
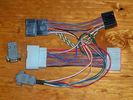
Loom134 views
|
|
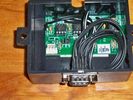
Controller Box152 views
|
|
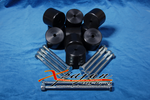
lift kit26 viewssadly not for disco
|
|

HID Kit18 views
|
|
474 views
|
|
1485 views
|
|
1293 views
|
|
Thread upload4 viewsImage uploaded in new thread
|
|
Thread upload2 viewsImage uploaded in new thread
|
|
Thread upload10 viewsImage uploaded in new thread
|
|

Thread upload13 viewsImage uploaded in new thread
|
|
![Filename=lr072537-oem-amk-full-compressor-kit-to-replace-hitachi-or-amk-1244723-1-p[ekm]270x224[ekm].jpg
Filesize=15KB
Dimensions=270x224
Date added=26.Feb 2020 lr072537-oem-amk-full-compressor-kit-to-replace-hitachi-or-amk-1244723-1-p[ekm]270x224[ekm].jpg](albums/userpics/33392/thumb_lr072537-oem-amk-full-compressor-kit-to-replace-hitachi-or-amk-1244723-1-p%5Bekm%5D270x224%5Bekm%5D.jpg)
Thread upload8 viewsImage uploaded in new thread
|
|

Thread upload2 viewsImage uploaded in thread 204346
|
|
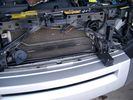
19mm wiring loom in trough behind bumper and in front of rad790 viewsThe 19mm wiring loom is large enough that a maximum of six 6mm air lines can be fished thru as required. The loom runs from the FASKIT panel located in the engine compartment behind the left front headlight, down and across in front of the rad and then down to the front axle valve block located behind and below the right fog light.
|
|
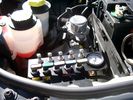
View of mounted panel from front left side872 viewsNote that all valve handles are shown in the OFF position, (the trouble position). In this case, the air that is in the air springs, (if any), is trapped in there - that is the valve blocks cannot vent whatever air is already in the air springs as the air lines between the springs and respective valve blocks are closed off by the FASKIT valves. In operation, there may be only trouble with one air spring, (perhaps a wheel height sensor), and as such, only one valve would need to be closed. If there was complete air compressor failure, then all valves would be closed and then as required, each spring could be manually filled from an outside clean dry oil free air source.
|
|
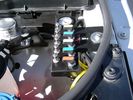
View of mounted panel from front left corner732 viewsI drilled a hole for the supplied 6 mm tie down toggle bolt in a flat portion of the wing on which the panel sits. I inserted a 50 mm flat rubber washer between the wing metal surface and the underside of the black painted panel plate; also a 40 mm flat rubber washer between the supplied fender washer and the metal plate - just seemed like a good idea so surfaces mate well even if wing metal not completely flat.
|
|
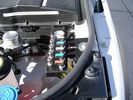
View from front left side looking towards rear aux battery compartment under cover 643 viewsAs there is no Fuel Burning Heater in the NAS V8 petrol vehicles, there is space available to install the FASKIT panel here. The piping is such that each air spring can be isolated from the air system and then filled one at a time manually via the Schrader valve. There are five Schrader valves and five shutoff valves. The fifth valve nearest the gauge controls air from the compressor, and can provide fill up air via a jumper fill line assuming the compressor is still operational.
|
|
Empty space in NAS LR3 for location of FASKIT panel596 viewsThe empty space is available as the North America Spec gasoline engine LR3's do not have the Fuel Burning Heater installed. The air lines from the four air springs and the air tank will appear to rise up from under the headlight assembly. The lines to the front block valve assembly located behind the front right fog light will sort of run within the bumper across the front of the radiator down into behind the righthand fog light. The rear lines somewhat follow the path of the existing air feed line from the front valve assembly to compressor. Rather than be located between the left front fender liner and left metal wing however, the four lines will feed thru the empty wing space inside and above the wheel well arch and exit down by the left front mud flap. From there, the lines run along the left frame member above the air tank and then parallel the frame over top the compressor to the top of the rear left air spring where the rear air block valve assembly is located.
|
|
19 mm wire, (tubing), loom rising from below at left headlight654 viewsFrom the FASKIT panel, five air lines fit in the 3/4" (19mm) wiring loom and feed to the front air valve block located behind and under the right front fog light.
|
|

Wiring (tubing) loom at left headlight showing FASKIT panel 582 viewsThis shows the wiring (tubing) loom and FASKIT panel mounted to left wing. The loom moves a a couple of inches (50mm) towards the bottle once the headlight is put back in as there is not enough free space for the loom as located. The FASKIT panel is just visible at the top left corner of the picture.
|
|
Wiring, (tubing), loom exiting temporarily from the front right fog light.567 viewsThe front axle air valve block is located just behind and below the fog light. Access to the valve block is by removing the right front fender liner, (or the bumper). The FASKIT lines are attached to the left and right front air spring lines at this location; also compressor air is taken from this location as well. Cutting the lines at as few different locations makes it easier to find leaks at a later date. As above, five 6mm air lines run from the FASKIT panel to the front axle air valve assembly and run within the loom. Two pair of the lines are for control of the air springs, and the fifth line taps the air supply at the valve block assembly off the compressor. This will be the air source line rather than tapping in directly to the high pressure air tank.
|
|

LR3 TDV6 RRS TDV8 Engine Pre-heating Operating Instructions - Appendix343 viewsThis is the instructions you get with the LR original Webasto timer kit
|
|

Thread upload2 viewsImage uploaded in thread 5
|
|
190 views
|
|
189 views
|
|
Thread upload2 viewsImage uploaded in new thread
|
|

Thread upload5 viewsImage uploaded in thread 175355
|
|
![Filename=M...20 Winch Kit VUB501471[1].pdf
Filesize=190KB
Dimensions=0x0
Date added=14.Jan 2010 M...20 Winch Kit VUB501471[1].pdf](images/thumb_pdf.jpg)
163 views
|
|
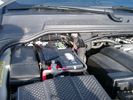
Main Battery showing aux cable feed running off positive battery post.771 viewsThe black wiring loom around the battery cable to the aux battery was a part provided with the Traxide kit. My goal was to run the cable low enough such that the battery box cover would go back on as previous.
Note the hole drilled in the side of the battery box such that the new cable could thread thru to allow the battery box top to still fit the same as prior to the addition of the cable to the auxiliary battery.
|
|
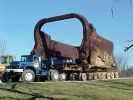
230 TON BUCKET136 views
|
|
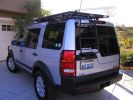
New kit fitted187 viewsSince I was able to pick-up a second hand Hannibal rack, I decided it was time to get the rear ladder fitted. Makes it a LOT easier to get stuff on and off the rack. And I am able to climb up there if needed.
|
|
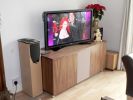
New AV Kit158 views
|
|
Thread upload6 viewsImage uploaded in new thread
|
|
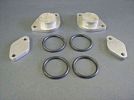
Contents of the BAS EGR Blanking Kit846 viewsThe O-ring seals are fitted to the 2 larger blanks at the top of the picture. You need to fit 2 O-rings to each blank.
|
|
148 views
|
|
147 views
|
|

ZF Oil_change_kit_for_automatic_transmissions28 views
|
|
315 viewsStorage of recovery kit in 2nd battery compartment
1 x 8m strop, 1 x 2m tree strop, 2 x bow shackles & 1 x pully block
|
|
Rebuild Kit1024 viewsReplacement custom Crown Wheel & Pinion, upgraded seals, OE bearings, replacement needle bearings.https://www.facebook.com/DifferentialPartsUS
|
|
Traxide SC80-LR644 viewsKit -- cable was 6 feet short. Check to ensure the length is adequate prior to installing it.
|
|

traxide797 viewsThis would be an ideal location for the traxide 80 kit, there are pre threaded holes available here.. would take a bit of fitting, and extending the cable to the primary battery would need to be extended.
|
|
DIII LR3 1423 viewsFitted Accessories
Devon 44 hidden winch
Warn XD9000 with remote kit
Safari Snorkel
Rover Specialties Rock Sliders with side nerf bars.
Yellow Top 2nd Battery
Available from --
http://www.lucky8llc.com/Products.aspx?ProductID=7136
Traxide SC80-LR D3 Kit B -TPSE
Available from --
http://www.traxide.com.au/Traxide.html
|
|
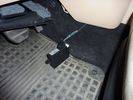
connectivity module57 viewsthis part is used for the aftermarket kit and will be removed
|
|
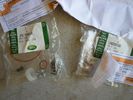
Both Compressor kits shown together418 viewsLR020590 KIT - COMPRESSOR 1
JPO500010 KIT - COMPRESSOR 1
|
|
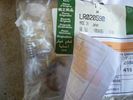
LR020590 KIT - COMPRESSOR 1475 viewsThere are 4 main parts you can get besides a whole compressor. This is the one with only a spring, o-ring and rubber valve.
YWB500220 electrical, fuse & relay, relay ENGINE COMPARTMENT, 70 amp 1
LR020590 KIT - COMPRESSOR 1
JPO500010 KIT - COMPRESSOR 1
VUB504700 - Dehydrator PARTS
|
|
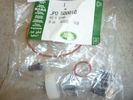
JPO500010 KIT - COMPRESSOR 1428 viewsThere are 4 main parts you can get besides a whole compressor. This is the one with more bits.
YWB500220 electrical, fuse & relay, relay ENGINE COMPARTMENT, 70 amp 1
LR020590 KIT - COMPRESSOR 1
JPO500010 KIT - COMPRESSOR 1
VUB504700 - Dehydrator PARTS
|
|
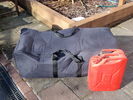
Kit / Roof Bag22 views
|
|
Thread upload0 viewsImage uploaded in new thread
|
|

126 viewsCan be used as Wallpaper for Parrot Hands free kit screen
|
|
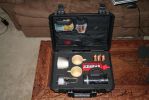
Extreme Expedition Java Kit191 views
|
|
682 views
|
|
605 views
|
|
567 views
|
|
565 views
|
|
700 views
|
|
609 views
|
|
685 views
|
|
679 views
|
|
763 views
|
|
603 views
|
|
564 views
|
|
646 views
|
|
633 views
|
|
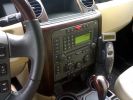
Nokia 616 car kit470 views
|
|
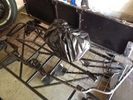
Disco3 Commercial Conversion Kit35 views
|
|
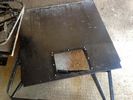
Discovery 3 Commercial Kit Floor29 views
|
|
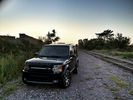
D3 Body Kit223 views
|
|

Thread upload11 viewsImage uploaded in thread 120622
|
|
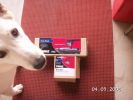
188 viewsKit Numbers, fittings of 3027 have a "L" shaped plate
|
|
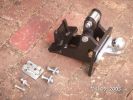
197 viewsThe Kit
|
|
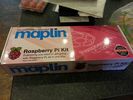
pi anyone?18 views
|
|
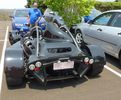
Spotted near Toowoomba44 viewsRCR Superlite Razor kit car built for hillclimbing. Believed to be the only one registered for road use in Australia. V nice...
|
|
Rear body kit189 views
|
|

Redundant Parts972 viewsThese are what you are left with once the EGR blanking kit is installed. Best to hang onto them in case you need them again!
|
|
Reservoir Air In fitting installed 1648 viewsSchrader valve installed. Shop air can now be introduced into the tank to facilitate the raising of the 3 when there has just been a failure of the onboard air compressor rather than the electronics or valve block wiring etc.
Air could also be sourced from this point, however the purpose of the modification is air in, not air out as the air pressure normally runs above 200 psig, too high to be safe for routine use unless a pressure reducing regulator is added per the Mitchell Bros kit.
|
|
130 views
|
|
139 views
|
|
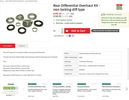
Electronic height controller trial kit245 viewsElectronic height controller kit incl trial extension looms & dummy plug
|
|
12v Isolator875 viewsEnsures that aux ery won\'t charge until the main batt is topped up and won\'t drain the main batt. I used the biggest I could find to take the load with no stress - especially the higher voltage on the landy. Came as a compete kit and works well.
|
|
Thread upload3 viewsImage uploaded in thread 165158
|
|
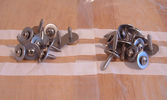
Kit of Stainless Mudflap screws17 views
|
|

Timing_kit_Sealey box46 views
|
|

Sealey timing kit_open_TDV644 views
|
|

Thread upload3 viewsImage uploaded in new thread
|
|
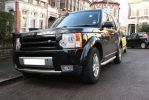
158 viewsSide view of colour coded wheel arches and bumper
|
|

Blown Xenon Bulb11 viewsThis is a blown xenon bulb. The headlight would not turn on, just flickered for a couple of seconds.
|
|
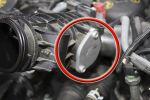
Stub Pipe Blank Fitted948 viewsRemember to fit 2 O-rings from the kit to each one!
|
|
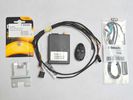
Thread upload1 viewsImage uploaded in thread 190324
|
|
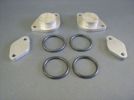
TDV6 EGR Removal kit180 views
|
|

Thread upload9 viewsImage uploaded in new thread
|
|

Thread upload11 viewsImage uploaded in new thread
|
|

Thread upload11 viewsImage uploaded in new thread
|
|
![Filename=Technical Service Bulletin SB034 SB036 Vehicle Enhancement Program[1].pdf
Filesize=959KB
Dimensions=0x0
Date added=17.Jun 2010 Technical Service Bulletin SB034 SB036 Vehicle Enhancement Program[1].pdf](images/thumb_pdf.jpg)
Technical Service Bulletin SB034 SB036 Vehicle Enhancement Program2384 viewsOn page 6 and following are the Land Rover service bulletin instructions as to how to install delivery valve and exhaust valve repair kit JPO500010; also a list of previous compressor model numbers as related to the 3. The new delivery valve is easy to install, the exhaust, not so easy. Note that this in not the more recent TSB that reduced the operating pressure of the compressor via a software fix and also recommended replacement of the air compressor 70 amp relay. See the F35 album near the bottom for the relay material.
|
|

Thread upload3 viewsImage uploaded in new thread
|
|

Thread upload4 viewsImage uploaded in thread 194599
|
|

Thread upload6 viewsImage uploaded in new thread
|
|

Thread upload6 viewsImage uploaded in new thread
|
|

Thread upload11 viewsImage uploaded in thread 143255
|
|
Thread upload5 viewsImage uploaded in thread 160753
|
|

Thread upload1 viewsImage uploaded in new thread
|
|

tow bar winch42 views
|
|
| 413 files on 2 page(s) |
 |
1 |  |
|