| Search results - "modification" |
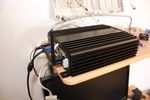
79 viewsCarPC closed and ready for mounting. Note the modification to the rear of the case to allow extra USB sockets attached to the motherboard pins.
|
|
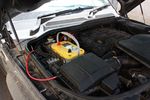
124 viewsOptima Yellow Top in battery box. This is the version with side terminals so there will be some modifications to be done to fit
|
|
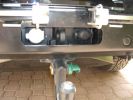
LR towing electrics pack 12N/12S312 viewsThe LR trailer electrics fitted before the Kaymar bumper and spare wheel carriers required no modifications are perfectly accessible. Good strong recovery point between the sockets too. The swing awau wheel carrier securing latches can be seen quite clearly here. Long Ranger tank (painted black) nestles where orignal spare was fitted.
|
|

Part 1 of the LF Inset in Grill Installation221 viewsDetailes of the Grill preparation as well as the modifications needed to the front end.
|
|

Deka Battery Dimension Data613 viewsThe battery size that I installed for my auxiliary was a BCI 40R battery as it was for me the easiest to fit and was also a cranking battery. The case profile was such that no tie down fins were located on either bottom end, (sides yes), and length wise, it was only about 11" (290 mm) long. As such, I did not have to grind the nibs at the front bottom of the plastic surround.
I did however raise the bottom of the battery above the angled nibs as I set the battery on a 1" (25mm) high plastic spacer. The total height, (battery plus spacer), was about 8" (200mm) so the battery top still fit under the Land Rover factory cover.
For the Aux battery, when I replaced the 40R, I installed an Interstate BCI 47 which is similar in size to a DIN H5. I was therefore able to eliminate the vertical spacer as the Group 47/H5 is the same height as the DIN H7/H8 stock LR spec starting battery. As such, the standard battery tie down bolts can be used without modification. The Group 47 battery is 9 11/16" long x 6 7/8" wide x 7 1/2" (190mm) high.
|
|
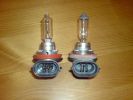
H9 on the left after modification266 views
|
|
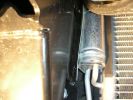
310 viewsLeft hand side impact absorber almost touching cooling system on NA spec truck. Absorber required modification.
|
|
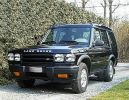
Heavy Duty Disco92 viewsMy first Disco after some modifications...with Photoshop at least.
|
|

EAS Aftermarket Modification.18 viewshttp://www.mudtech4x4.com
|
|

Before Modification203 views
|
|

Headlight mod266 viewsHeadlight mod to my07 land rover discovery 3
|
|
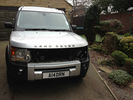
Modification work, nice birdy13 views
|
|
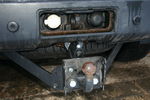
Modified Thule 9705 plate42 viewsShows the adapter plate after modification to improve departure angle
|
|

160 views
|
|

Modification so that the headrest is adjustable833 views
|
|

Modification so that the headrest is adjustable1015 views
|
|

Modification so that the headrest is adjustable818 views
|
|

Modification so that the headrest is adjustable1082 viewsmax. height
|
|

Modification so that the headrest is adjustable781 views
|
|
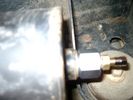
Reservoir Air In fitting installed 1648 viewsSchrader valve installed. Shop air can now be introduced into the tank to facilitate the raising of the 3 when there has just been a failure of the onboard air compressor rather than the electronics or valve block wiring etc.
Air could also be sourced from this point, however the purpose of the modification is air in, not air out as the air pressure normally runs above 200 psig, too high to be safe for routine use unless a pressure reducing regulator is added per the Mitchell Bros kit.
|
|
|
|